かつてDockerはLinux以外にインストールするにはVirtualBox等使って仮想マシンを用意したのち、仮想マシン上にインストールするもんだったようですが、最近、自分のようなよく解ってない人間にもDockerできるDocker for Macがリリースされたようです。
なんか簡単そうなので、wordpressのテーマとかいじる時用の環境を作ってみます。
Docker for Macインストール
Docker for MacのStable channelを使用します
“Get Docker for Mac (stable)”からDocker.dmgをダウンロード
ダブルクリック=>Docker.appをApplicationsにD&D
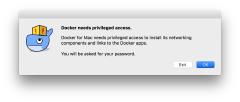
ファインダーのアプリケーションからDocker.appを実行。


ステータスバーにDockerのアイコンが追加されます。
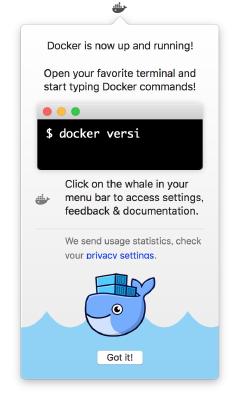
最初はウエルカムメッセージっぽい表示が出ます。

“Got it!”
インストールチェック
ターミナルでバージョン表示してみます。
1
2
3
4
5
6
|
Mac ~$ docker --version
Docker version 1.13.0, build 49bf474
Mac ~$ docker-compose --version
docker-compose version 1.10.0, build 4bd6f1a
Mac ~$ docker-machine --version
docker-machine version 0.9.0, build 15fd4c7
|
 1
 2
 3
 4
 5
 6
 7
 8
 9
10
11
12
13
14
15
16
17
18
19
20
21
22
23
24
25
26
27
|
Mac ~$ cd ~/src/docker/
Mac ~/src/docker$ docker run hello-world
Unable to find image 'hello-world:latest' locally
latest: Pulling from library/hello-world
78445dd45222: Pull complete
Digest: sha256:c5515758d4c5e1e838e9cd307f6c6a0d620b5e07e6f927b07d05f6d12a1ac8d7
Status: Downloaded newer image for hello-world:latest

Hello from Docker!
This message shows that your installation appears to be working correctly.

To generate this message, Docker took the following steps:
 1. The Docker client contacted the Docker daemon.
 2. The Docker daemon pulled the "hello-world" image from the Docker Hub.
 3. The Docker daemon created a new container from that image which runs the
    executable that produces the output you are currently reading.
 4. The Docker daemon streamed that output to the Docker client, which sent it
    to your terminal.

To try something more ambitious, you can run an Ubuntu container with:
 $ docker run -it ubuntu bash

Share images, automate workflows, and more with a free Docker ID:
 https://cloud.docker.com/

For more examples and ideas, visit:
 https://docs.docker.com/engine/userguide/
|
1
2
3
4
|
Mac ~/src/docker$ docker run -d -p 80:80 --name webserver nginx
Mac ~/src/docker$ docker ps
CONTAINER ID        IMAGE               COMMAND                  CREATED             STATUS              PORTS                         NAMES
a4eabae453e3        nginx               "nginx -g 'daemon ..."   22 seconds ago      Up 21 seconds       0.0.0.0:80->80/tcp, 443/tcp   webserver
|
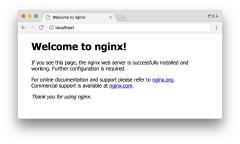
http://localhost/にアクセスすると、

動いてます。
WordPress用コンテナ作成
tutum/wordpressというのを使うとお手軽そうです。
```bash
Mac ~/src/docker$ docker run -d -p 80:80 --name=wordpress tutum/wordpress
```
と思ったら、tutum/wordpressはもう使うな的なことが書いてありました。
こっちを使えとのこと、https://hub.docker.com/_/wordpress/。
この人単体だとMySQLとか入っていないようなので、そちらも別途用意してやらないといけないようですが、DockerHUBの説明ページにdocker composerの例が出てるので、そのまま使います。
1
2
3
4
|
Mac ~/src/docker$ mkdir wordpress
Mac ~/src/docker$ cd wordpress/
Mac ~/src/docker/wordpress$
Mac ~/src/docker/wordpress$ code docker-compose.yml
|
内容はコピペで。パスワード部分は外部ファイルにした方がいいような気もする。
 1
 2
 3
 4
 5
 6
 7
 8
 9
10
11
12
13
14
15
|
version: '2'

services:

  wordpress:
    image: wordpress
    ports:
      - 8080:80
    environment:
      WORDPRESS_DB_PASSWORD: example

  mysql:
    image: mariadb
    environment:
      MYSQL_ROOT_PASSWORD: example
|
起動します。
1
|
Mac ~/src/docker/wordpress$ docker-compose up
|
なんか
wordpress_1 | MySQL Connection Error: (2002) Connection refused
とか出るんで、
追加してみたけど、あんまり効果なし。
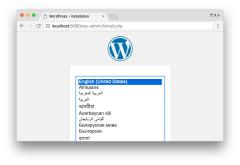
気にせずにhttp://localhost:8080/にアクセスすると、

出ます。
Mac側のファイルを参照するようにする
docker-compose.ymlに共有フォルダ設定(volumes)を追加すると、ホスト側(Mac)のコンテンツを使用できます。
Macで ~/src/wordpress/ にwordpressを展開してるとすると
1
2
3
4
5
6
7
8
9
10
11
12
13
14
15
16
17
18
|
version: '2'
services:
wordpress:
image: wordpress
ports:
- 8080:80
environment:
WORDPRESS_DB_PASSWORD: example
links:
      - mysql
volumes: # 追加
- ~/src/wordpress/:/var/www/html
mysql:
image: mariadb
environment:
MYSQL_ROOT_PASSWORD: example
|
といった感じです。
コンテナ作り直す
1
2
|
Mac ~/src/docker/wordpress$ docker-compose down
Mac ~/src/docker/wordpress$ docker-compose up
|
データベース抜き出し
composeで一緒にインストールされたmariadbのドキュメントの”Initializing a fresh instance”を参考にホストとの共有フォルダを設定します。
1
2
3
4
5
6
7
|
....
mysql:
image: mariadb
environment:
MYSQL_ROOT_PASSWORD: example
volumes: # 追加
- ./mariadb/docker-entrypoint-initdb.d:/docker-entrypoint-initdb.d
|
/docker-entrypoint-initdb.dにsql置いとくと勝手に実行してくれるようです。
コンテナ作り直し
1
2
|
Mac ~/src/docker/wordpress$ docker-compose down
Mac ~/src/docker/wordpress$ docker-compose up
|
docker上のWordpressでユーザーやサンプル記事など適当に作って、テスト環境を用意したらデータベースの内容をホスト側(Mac)にdumpします。参考”Creating database dumps”
もしgithubなんかでdumpを管理するつもりなら、メールアドレスはリアルなのを使わないようにしましょう。@example.jp推奨。
1
|
Mac ~/src/docker/wordpress$ docker exec wordpress_mysql_1 sh -c 'exec mysqldump --all-databases -uroot -p"$MYSQL_ROOT_PASSWORD"' > ./mariadb/docker-entrypoint-initdb.d/mysqldump.sql
|
リダイレクト先(./mariadb/docker-entrypoint-initdb.d/mysqldump.sql)はホスト側(Mac)のパスです。標準出力万歳。
コンテナ作り直しても、設定したユーザーとかが出てくればオK
1
2
|
Mac ~/src/docker/wordpress$ docker-compose down
Mac ~/src/docker/wordpress$ docker-compose up
|
git
gitで管理します。
docker定義のgitignoreは簡単で、
~/src/docker/wordpress/.gitignore
wordpressのgitignoreはちょい複雑。
gitignoreサンプルを参考に、.gitignoreを作ります。
色々悩んだ末、今の所こんな感じ。wordpress本体は管理しません。
 1
 2
 3
 4
 5
 6
 7
 8
 9
10
11
12
13
14
15
16
17
18
19
20
21
22
23
24
25
26
|
*.log
wp-config.php

# ignore wordpress
/*

# include customize targets
!wp-content/
wp-content/*
!wp-content/plugins/
!wp-content/themes/

# ignore these plugins
wp-content/plugins/hello.php

# ignore specific themes
wp-content/themes/twenty*/

# ignore node/grunt dependency directories
node_modules/

.htaccess
license.txt
readme.html
sitemap.xml
sitemap.xml.gz
|
で
Docker for Macのおかげですごい手軽にdockerできるようになりました。
dockerとgitで気軽にやり直しができるんで、Try&Errorな自分にはとってもいい環境な気がします。
この勢いで本番へのデプロイの自動化もしたいかも。してみました。


